
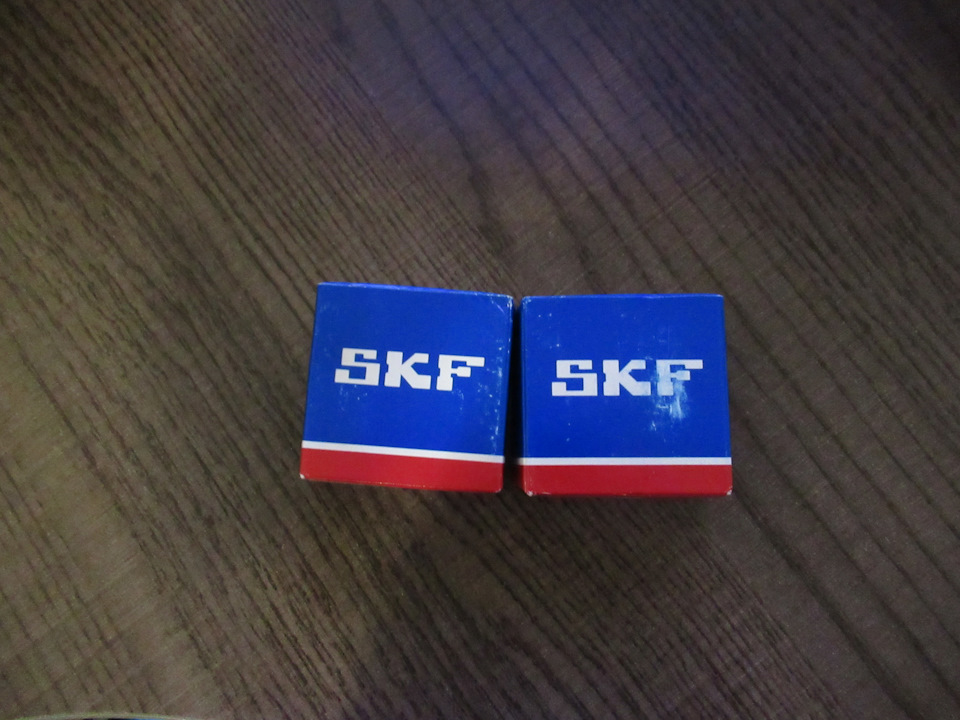
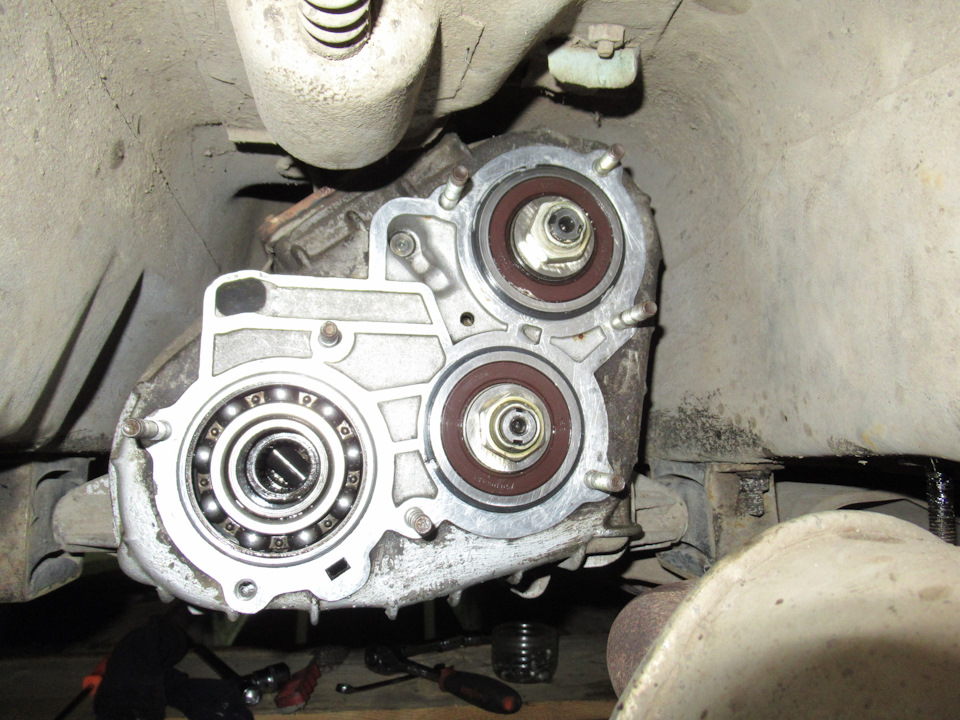
После зимних поездок по снежной целине и жесткого насилования раздатки она стала гудеть и вибрировать. Подняв машину на подъемнике и покрутив колеса на скорости стало ясно, что колбасит и гудит раздатка со стороны заднего фланца. Скорее всего умер двухрядный подшипник задней крышки. Съездил в магаз и купил новый подш, цена оказалась на него просто заоблачной — 990 руб, так же приобрел сальник ростеко и новый сапун.
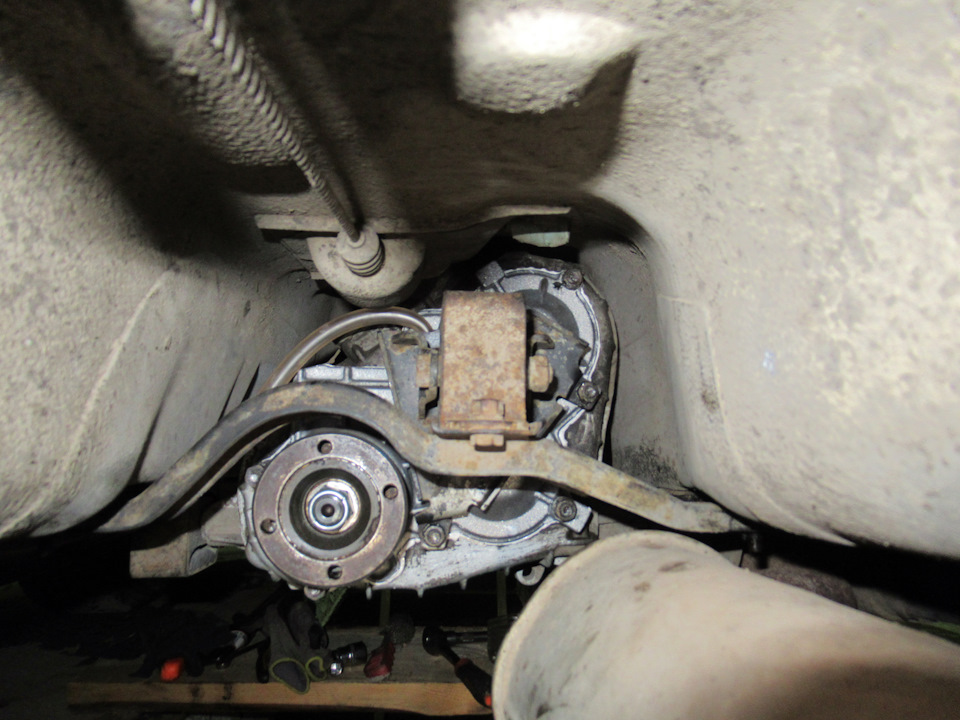
Скинул кардан, открутив 8 болтов при помощи двух ключей на 13 и потом открутил коромысло задней подушки РК и болт на 17 которым кронштейн РК крепится к подушке. Вытащил коромысло с задней подушкой. Открутил 3 гайки на кронштейне крепления к подушке РК и вытащил его. Далее открутил 7 гаек, которыми крепится задняя крышка к картеру раздатки,
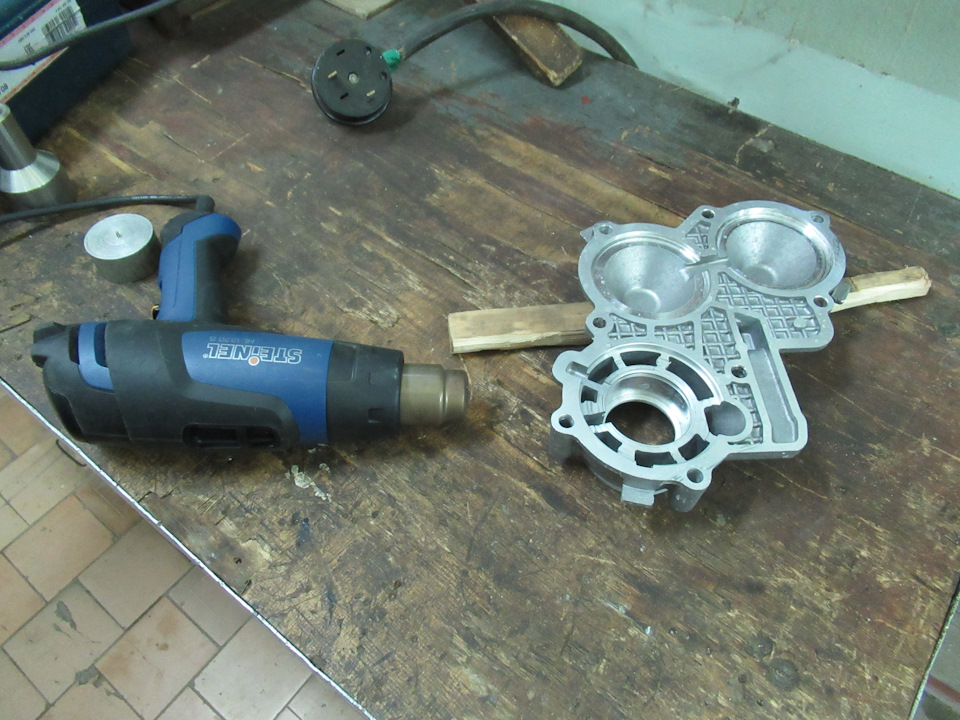
снял фланец, но крышка все равно никак не снималась, так как ее держал герметик. Нож канцелярский в щель между крышкой и картером рк не пролазил, пришлось бить по низу крышки и по левому ушку раздатки киянкой. В итоге левое ушко благополучно отломилось. Забил отвертку в щель, повредив немного картер и крышку, так как они очень мягкие — силуминовые. И только после этого крышка отошла. Снял ее.
Первичный осмотр ничего не показал, вроде бы все целое и рабочее.
Люфтил фланец, решил поменять подшипник, но правильный – без видимого люфта и хорошо крутящийся – оказалось найти очень сложно, но можно. Он мне попался в запчастях к грузовикам как подшипник распределителя КАМАЗа. точное название подшипника не помню, маркировка 305.
1. Откручиваем задний кардан от раздатки и вешаем его на веревке или проволоке к тяге, чтобы крестовины не попортить (у меня ШРУСы, но тоже подстраховался), сливаем масло из раздатки.
2. У кого шеви, откручиваем две гайки и болт крепления третьей опоры и снимаем ее.
3. Откручиваем от раздатки три гайки кронштейна третьей опоры и снимаем его.
4. Откручиваем гайку фланца и снимаем его, если надо менять сальник, то вытаскиваем его отверткой. Снимаем маслоотражательные шайбы, при этом удобно пользоваться магнитом.
5. Откручиваем 8 гаек крепления задней крышки раздатки и снимаем ее вместе с валом.
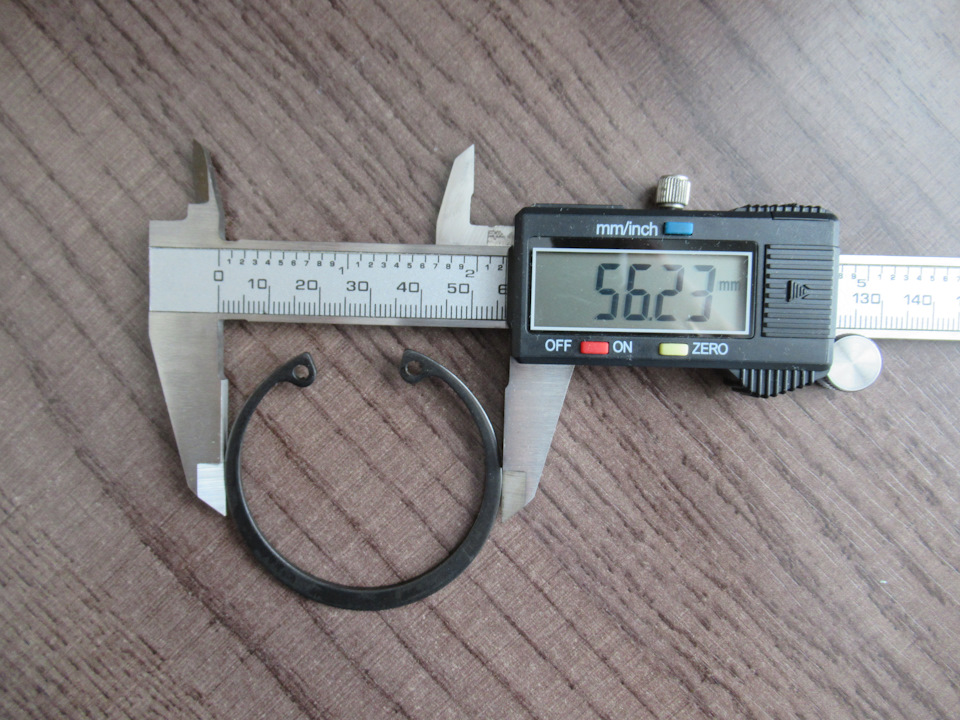
6. Вытаскиваем стопорное кольцо подшипника и аккуратно, чтобы не перекосить, через проставку выбиваем вал и подшипник.
7. Так как новую прокладку найти сложно, промываем и обезжириваем крышку, также очищаем от старой прокладки и обезжириваем соприкасающиеся с крышкой поверхности на раздатке.
8. Уперев внутреннее кольцо нового подшипника в губки тисков, аккуратно вбиваем в него вал, используя проставку из алюминия или меди.
9. Устанавливаем на место новый сальник.
10. Используя тиски и проставку, ставим на место подшипник с валом и маслоотражательными шайбами, устанавливаем стопорное кольцо и убеждаемся что оно полностью вошло в паз.
11. Если нет новой прокладки, на ее место намазываем тонким слоем герметик.
12. Ставим на место вал и прикручиваем крышку на место.
13. Шевинсты прикручивают кронштейн третьей опоры и саму опору.
14. Ставим на место фланец и кардан.
15. Заливаем масло и наслаждаемся отсутствием вибраций.
P. S. Между пунктами 10 и 11 можно вытащить стопорное кольцо и заменить опорный подшипник дифференциала.
Дополнение от 07.04.08, автор Васик-Нивасик
Всю процедуру выполнил на ровной площадке лежа под машиной, так как ямы у меня нет. Дополнения касаются пункта 5.
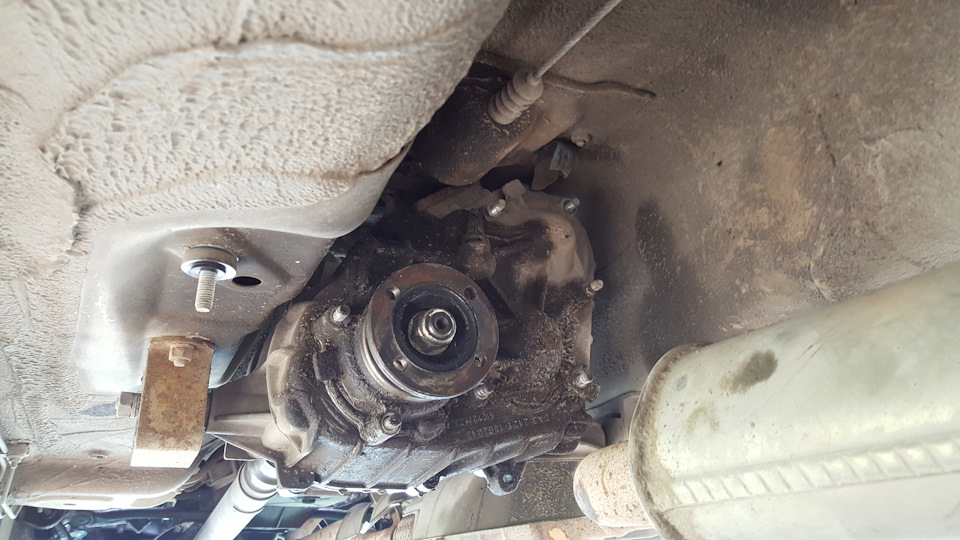
Задняя крышка раздаточной коробки просто так не снялась. В нижней части крышка крепится к раздатке длинными шпильками. Как я ни пытался снять крышку, ничего не получалось. Крышка упирается в заднюю часть туннеля.
Пришлось ослабить гайки обеих опор раздатки и чуть-чуть приопустить заднюю часть раздаточной коробки. Крышка сошла с длинных нижних шпилек и вал свободно вышел из дифференциала. Крышка повисла на верхней шпильке. Сниматься с верхней шпильки отказалась. Чтобы снять крышку с верхней шпильки пришлось под раздатку поставить гидравлический домкрат-столбик, полностью открутить задние гайки опор раздаточной коробки, и открутить почти до конца передние гайки. Аккуратно приопустить на домкрате раздаточную коробку еще ниже. После этого крышка снимается свободно. После замены подшипника собрать все в обратной последовательности.
От Ведущего FAQ. Помнится, у Tweaker’а ШевиНива.
Hello comrades! The topic is pretty banal, but to my surprise, relevant and workable. I’ll start by describing the symptoms. As it turned out, with a speed of movement from 60 km / h to 80 km / h, vibration appeared. With increasing speed, the vibration frequency increased and by 110 km / h ceased to be felt by the senses (5th point of the body). And with the discharge of gas and movement "on the move", the vibration intensified to such an extent that it became ticklish and a little scary. After reading the forum, drive — drove the car into the pit, as it turned out, the rear axle drive flange greatly loosens. I decided to look for a donor PK, a new type with double row bearings, put a 3: 1 kit and possibly a modified differential in it, and then put it on a car. But the plans changed, during the thaw or when the oil in the RK was warming up (IMHO), noises and tangible blows appeared on the body, as if someone had lightly tapped on the bottom of the car. I realized that you can’t pull anymore, I started looking for bearings, I wanted to put something good. On one site selling all kinds of machine tools, accessories for them and other piece of iron, male Avito, so to speak, found two SKF 3205 bearings at a modest price for them, completely new. One in the back cover of the Republic of Kazakhstan, the second in the front for the future.
So we need:
— RK cover, rear 21210-1802080-10
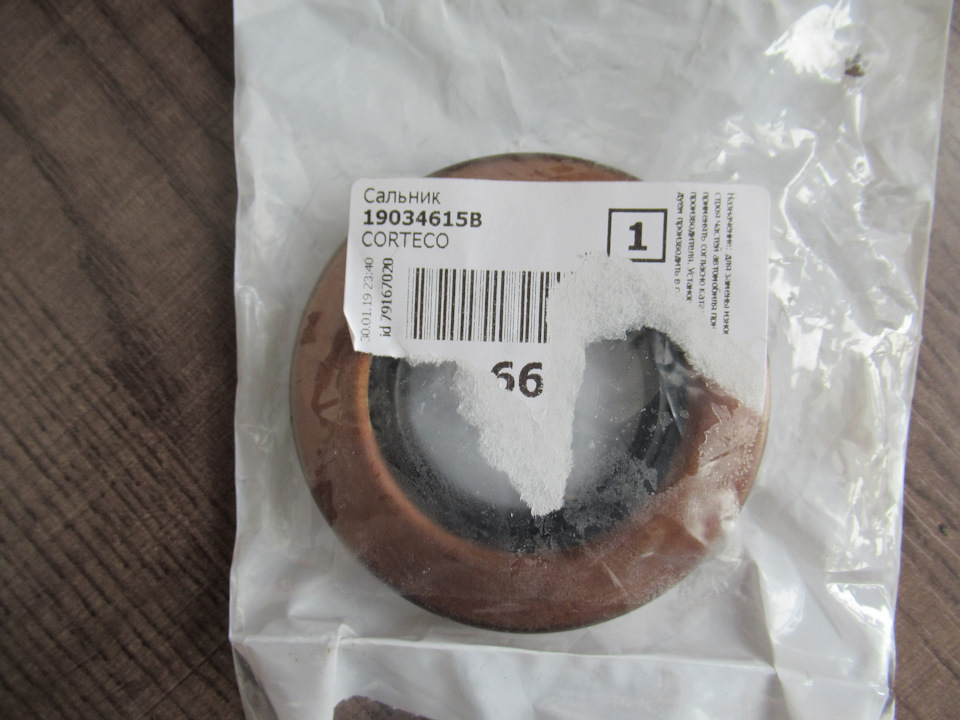
— oil seal 19034615B CORTECO (not badly recommended)
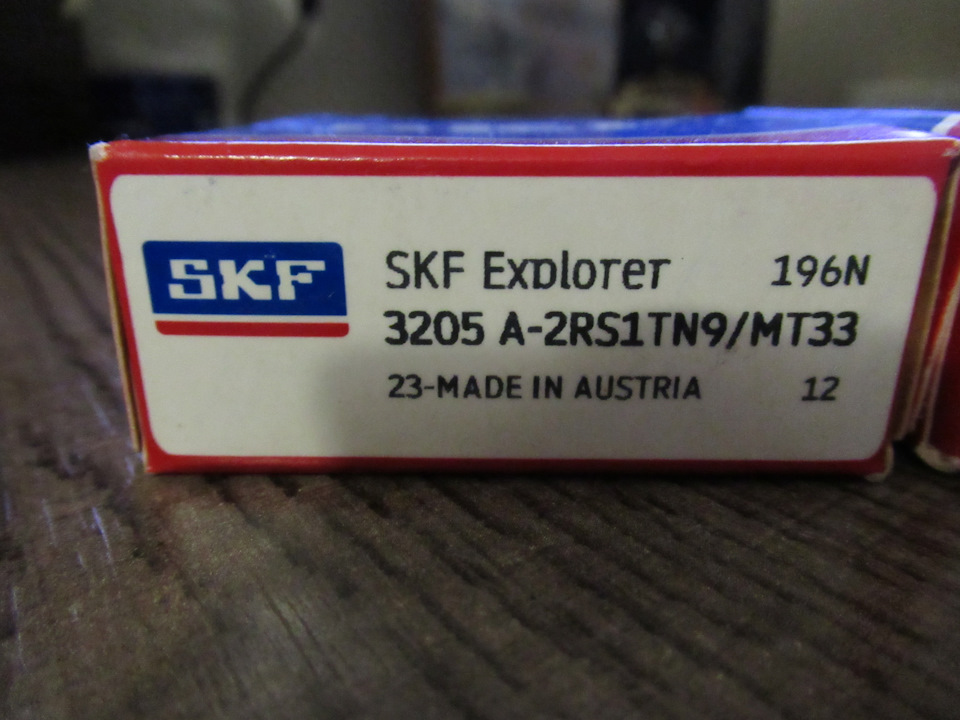
— bearing 3205 is an import designation, 21214-1802208 (if you buy a domestic one, then VBF GPZ-23 Vologda)
— installation ring 21210-1802209
— self-locking nut M16x1.5
— set of gaskets for PK or sealant
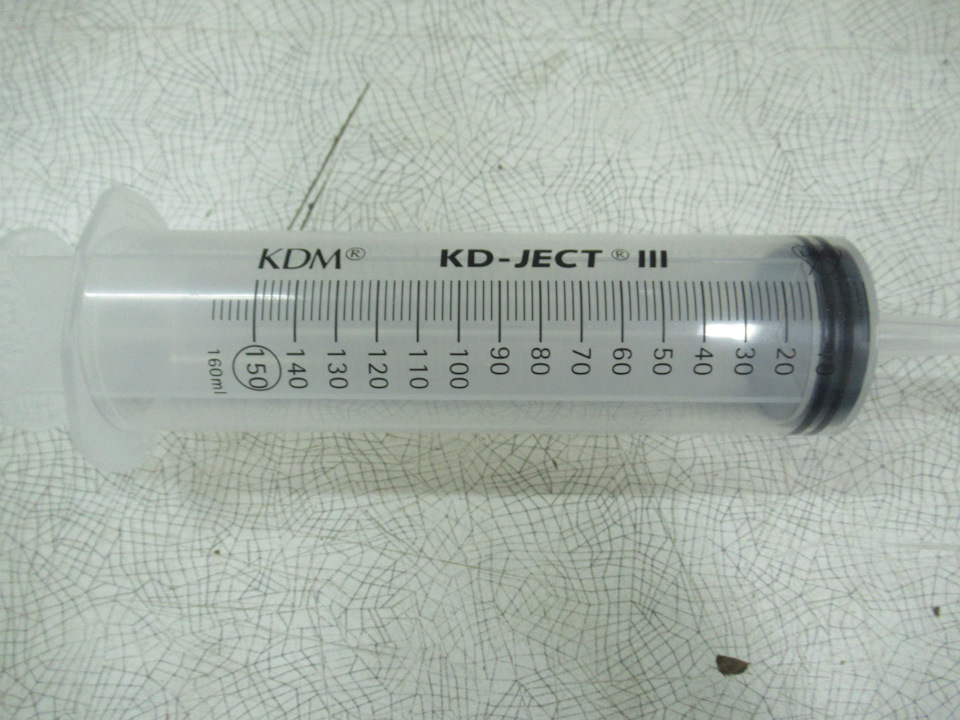
— a device for filling oil in the Republic of Kazakhstan (I bought a syringe Janet in the nearest pharmacy 160ml)
The process of removing the back cover of the PK is quite simple, although without a set of socket heads and a universal joint, I think it will be tight to them, most likely impossible. First you need to drain the oil from the RC, after the oil has drained, we twist the drain plug so that the oil does not drip onto the head and proceed to disassemble. We unscrew the driveshaft of the rear axle drive from the flange of the RK and take it to the side, I took off completely, it was easier for me. We unscrew and remove the rear support of the RK assembly with the bracket and cross member, three M8 nuts on the rear cover of the RK and two M8 nuts to the bottom of the machine. We unscrew the back cover of the RK, the M8 nuts — 8 pieces, gently pry the cover and remove it, the remaining oil may leak out carefully. Immediately took off the breather, prying it with a flat screwdriver, and left it to hang on a silicone hose.
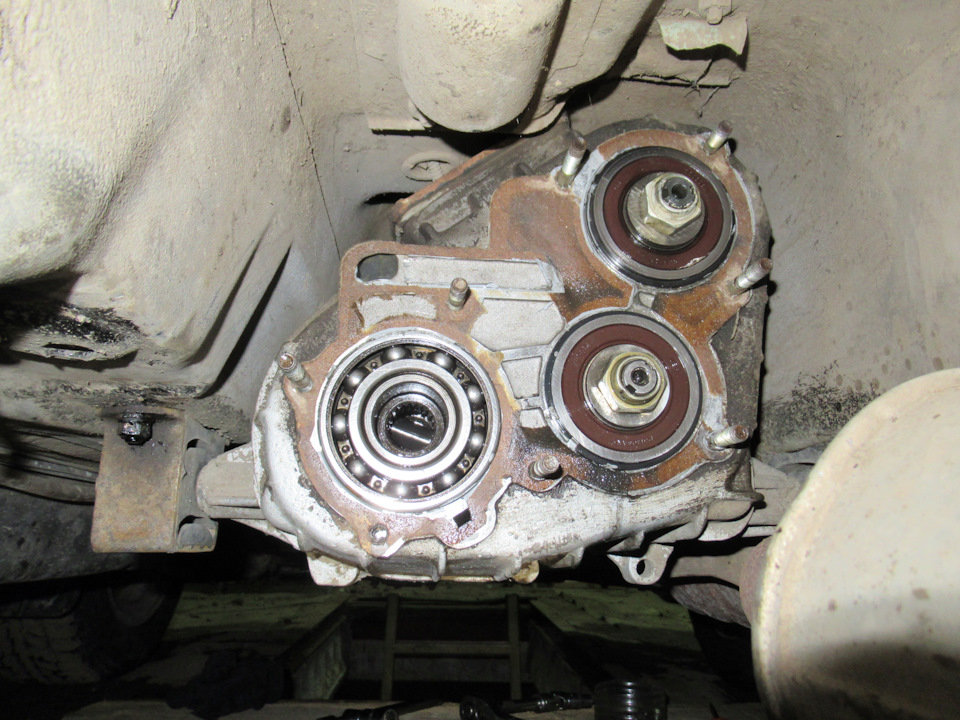
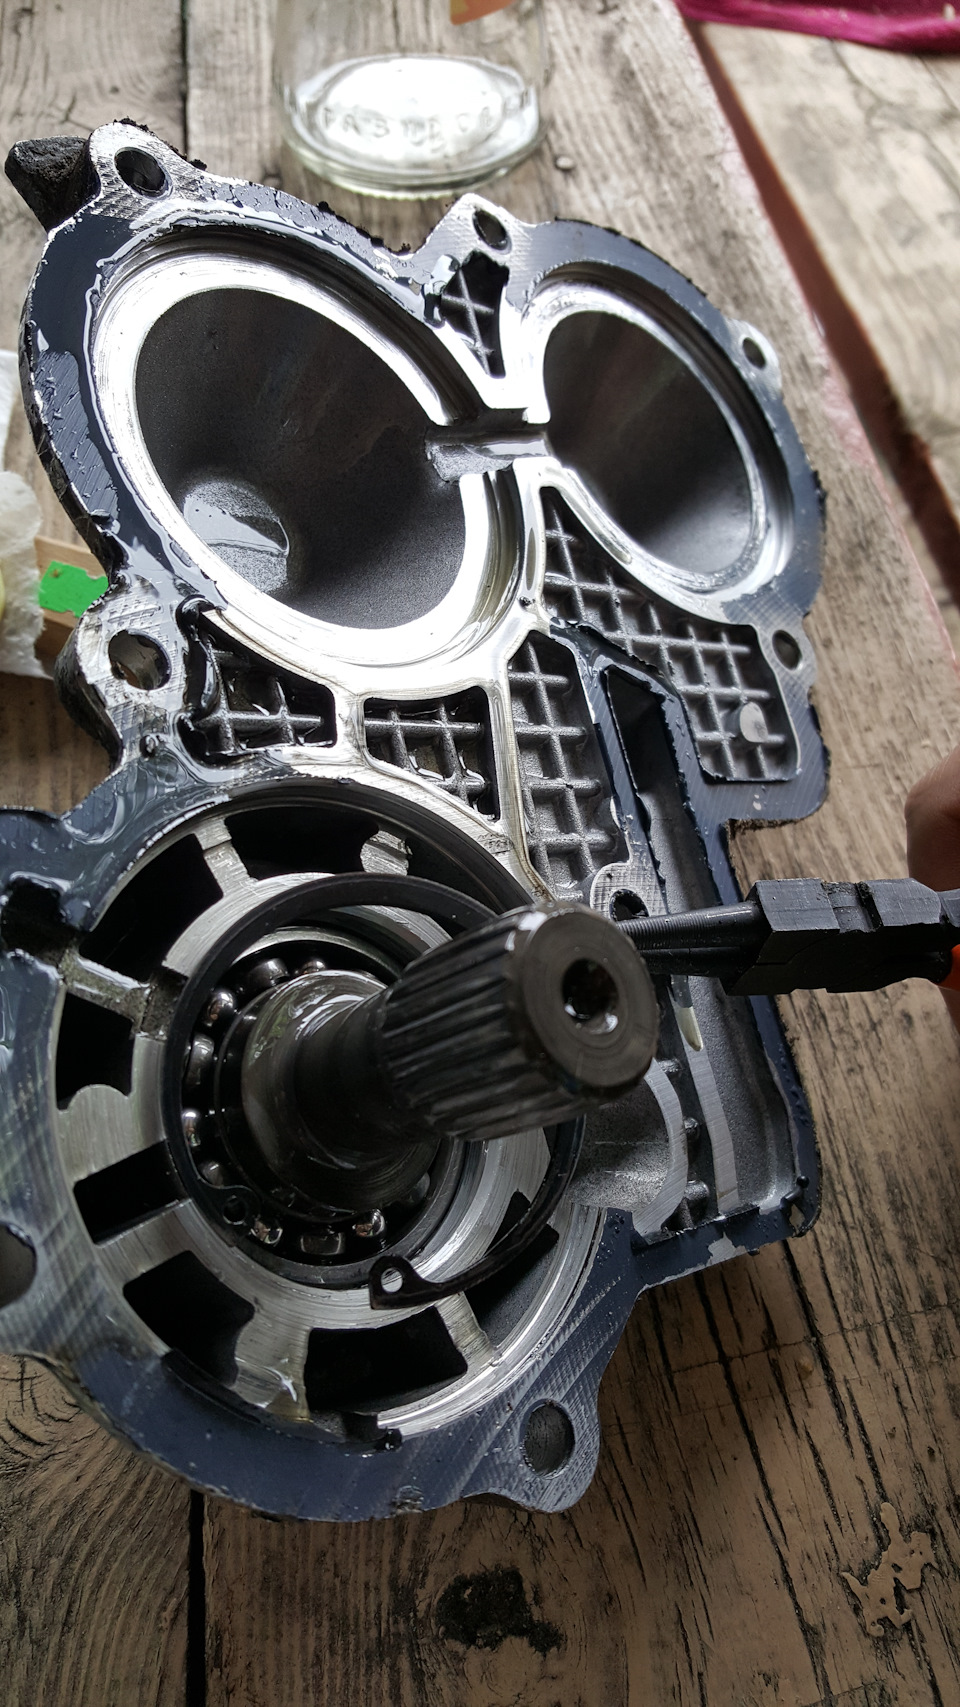
Now do the back cover. It is necessary to put the bearing in place, for this we warm the cover, I used a construction hair dryer.
After which the bearing itself fell into the landing. Immediately put the adjusting ring in place.
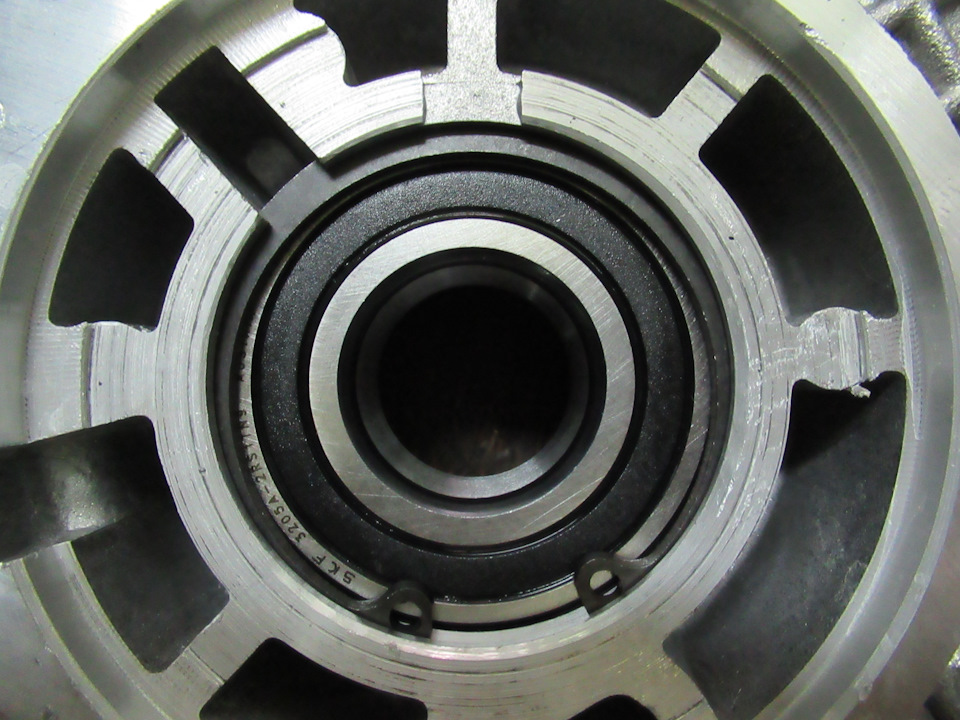
We install the gland in the cover, so that its upper edge is three millimeters lower than the upper edge of the cover.
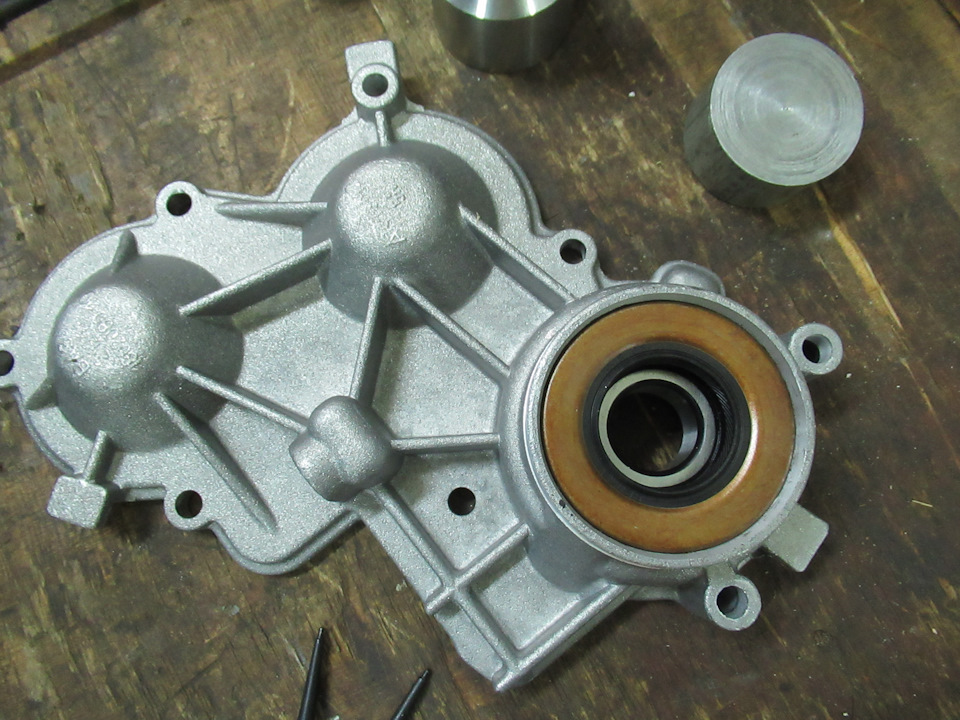
We take the old back cover, unscrew the M16 nut securing the flange to the shaft, I needed a vice and a piece of pipe, it was tightened from the heart. We remove the flange and press out the rear axle drive shaft from the old bearing. After that, the old cover can be handed over in color. The thrust ring and the oil deflector in the new cover do not need to be installed. By the way, the backlash was in the bearing and the bearing itself was backlash in the cover. We press in the rear axle drive shaft into a new bearing. We install the flange on the shaft, pre-lubricating the oil seal so that it does not work dry in the first minutes of its life. We tighten the self-locking nut M16. Do not forget about the breather, it does not stand on the thread, but on a tight fit, pull the breather out of the old cap and press it into a new one. Since I put a silicone tube on the breather, I did this procedure in place in the pit, having smeared the breather a little with sealant .
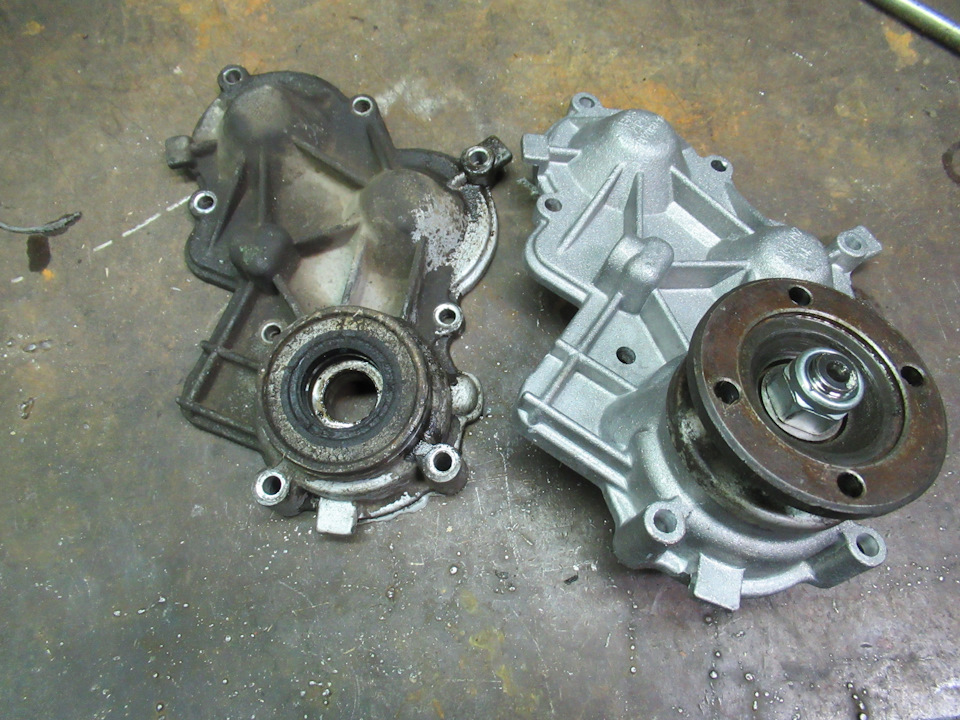
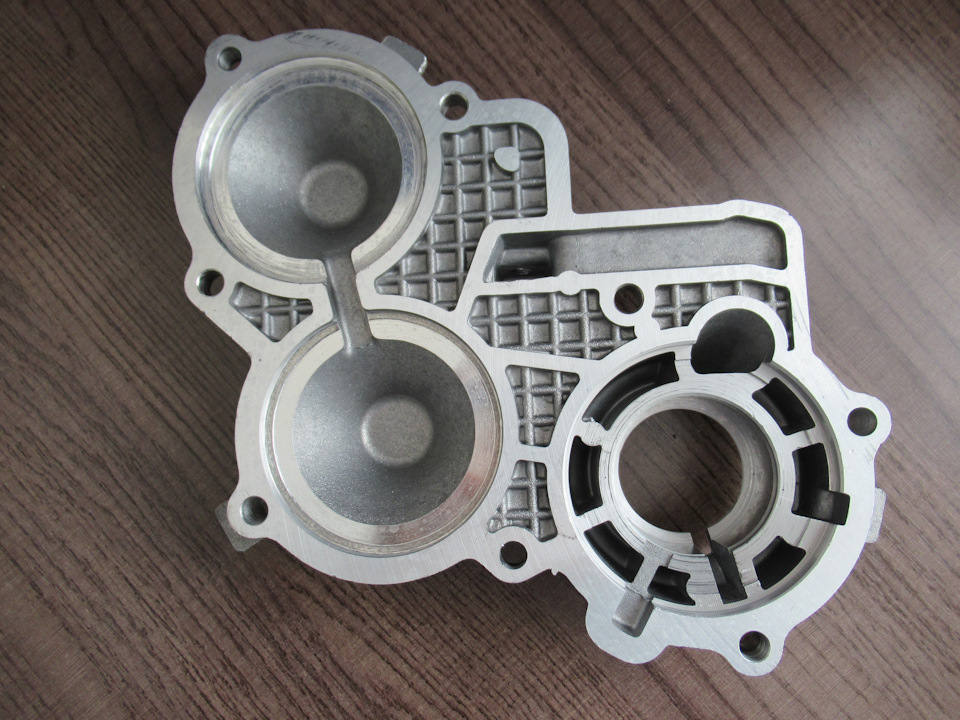
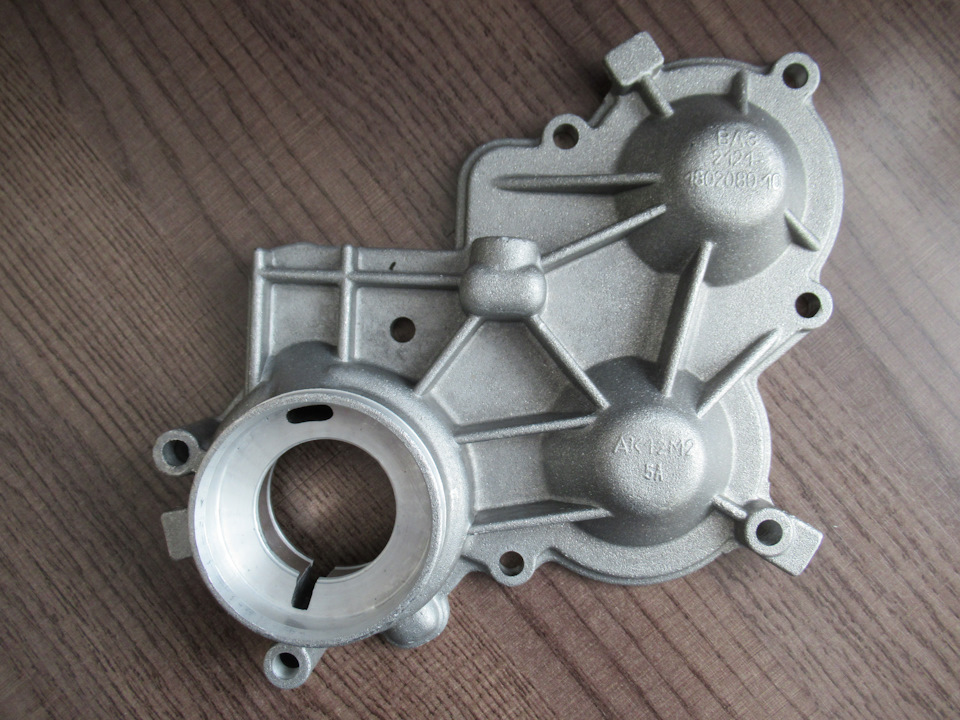
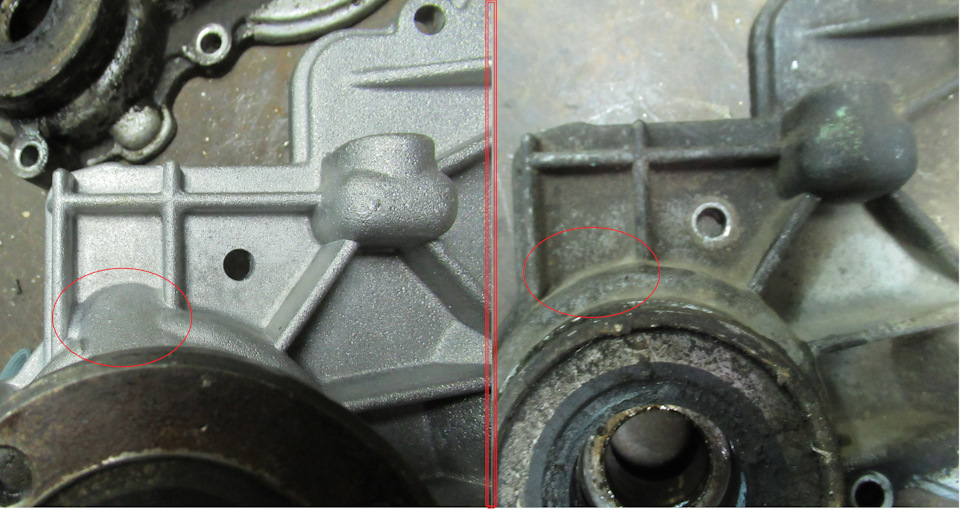
If anyone is interested, from the outside the old cover differs from the new one by the ebb. Well, of course, with numbers.
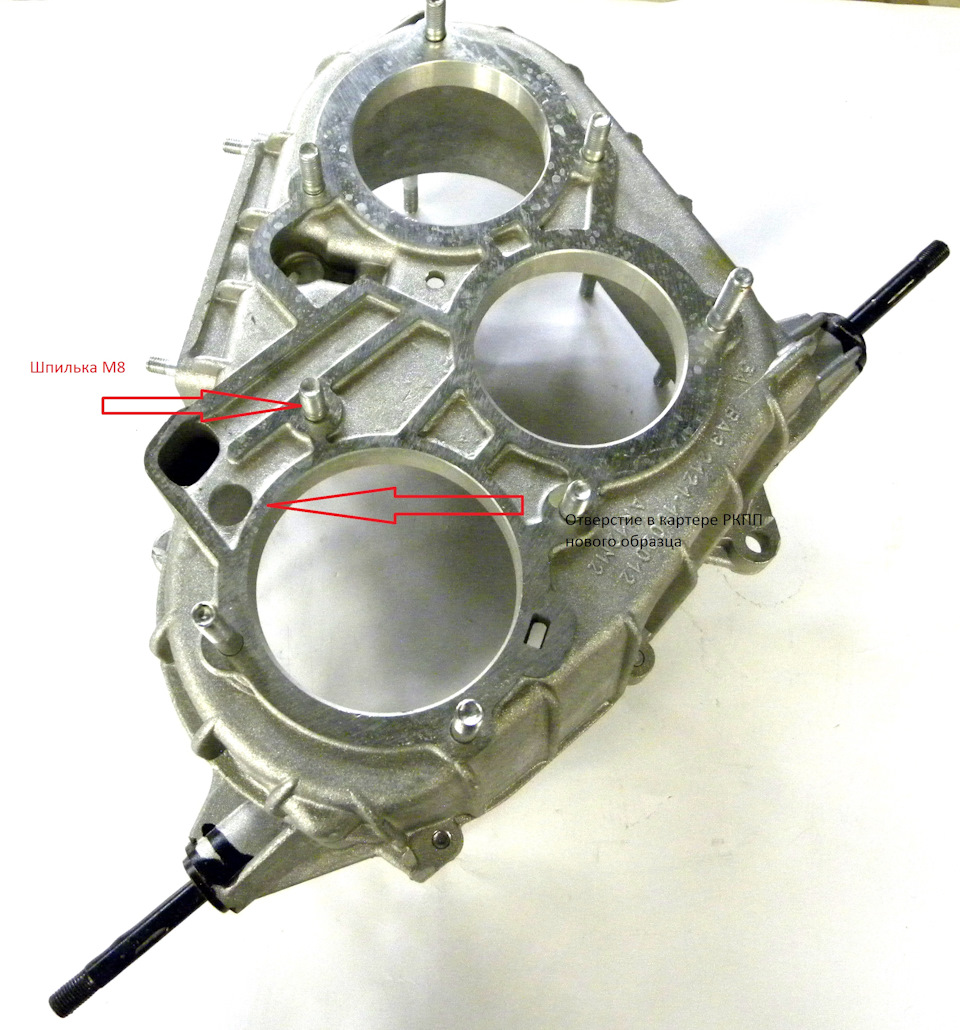
He didn’t drill the crankcase of the RK, firstly, the chips would still get into the crankcase, and secondly, the bearings were sealed with their grease, and the transmission mixed with abrasive and water would not feel better. Oil will somehow get to the bearing through the lower groove and through the differential bearing. In the future I plan to drill the crankcase when I take off the RK to install the CIT 3: 1. Speaking of drilling, many write that the diameter of the hole should be 6-8 mm. Here is a photo of the factory case, there is clearly not 8 mm, but probably 14-16.
We apply sealant to the new cover and fasten it to the RC, pull it carefully so as not to break the threads in the RC case, evenly tightening all the nuts.
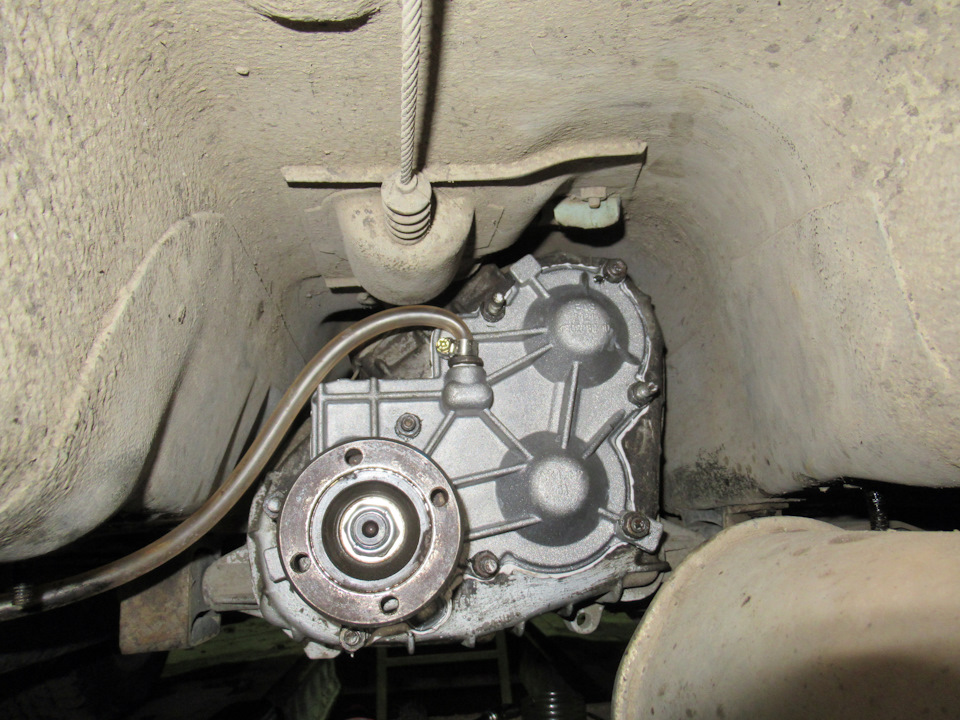
After we install the rear support on the razdatka, we fasten the driveshaft and do not forget to pour the transmission oil into the razdatka, it should be 0.79 liters there.
As a result, the vibration disappeared, now you can safely ride at speeds above 60 km / h without fear that something will fall off, although this is not accurate.